Monday, August 30, 2021

Use the Admin center to manage environments and data policies in Power Automate

 Use the Admin center to manage environments and data policies in Power Automate

Administer flows:

The Admin center is the central location where tenant admins and environment admins manage an organization's data policies and environments. Any changes that you make in the Admin center are immediately available to users in the organization.

How to Open the Admin center?

There are two ways to open the Admin center.

Option 1: Power Automate settings

Go to Power Automate, and sign in by using your organizational account.

Select the Settings button and then select Admin Center on the menu.

Option 2: Open the admin center directly

Go directly to the Admin center, and sign in by using your work account.


How to export and import a flow?

Power Automate allows you to export and then import a flow so that others can use that flows.

Export a flow

  1. Go to Power Automate, and sign in by using your organizational account.
  2. In the left pane, select My flows.
  3. For the flow that you want to export, select the More commands button (the three vertical dots), select Export, and then select Package (.zip).
  4. Fill in the package details:
  5. Select Export to export the zip file. You can then select the folder to which to download.
  6. When you export a flow, the dependent resources for your flow are also exported into the package.

Import a flow

  1. After a flow has been exported, anyone that you send the zip file to can import it.
  2. Go to Power Automate, and sign in by using your organizational account.
  3. In the left pane, select My flows.
  4. Select Import.
  5. On the Import package page, select Upload, and then, in the dialog box, select the zip file that you exported.
  6. Back on the Import package page, select Import.
    • In the flow settings, you can select whether to create a new flow or update an existing one with the flow definition from the package.
    • You must also select the connections that are required to set up the flow as part of the import process.
    • The Import button should become available after you've configured all the required settings.
  7. After the flow is completely imported, you will have a link to open it and see the flow in My Flows.

Sunday, August 29, 2021

Create and manage fields within an entity in Dataverse

 Create and manage fields within an entity in Dataverse

open a power apps 

After clicking on PowerApps, the below screen will be displayed where you can select your created environment shown in the top right corner.


After selecting your environment, you can create a new custom entity by clicking on the “Entities” tab shown in the left navigation bar under “Data”. After clicking on Entities on the above screen, you will be able to see all entities in this environment as shown in the below screen.

From the above screen, for creating a new entity click on “New entity”. This will show the screen in right as in the above image where you can enter details and click on the “Next” button which will show below the screen to add fields, views, forms, etc. Now, for adding fields for entity click on “Add field” which will open a window from the right side where you will enter details of the field, and for selecting data type click on the arrow in the “Data type” field which will open the list of all data types available for the field as shown above. After selecting the data type you will get the option to make the field as required or not.


After clicking on the “Done” button on the above screen you will see your field in the field section as shown below and then click on the “Save Entity” button which will save your entity and fields.

Now for creating views for entity click on the “Views” tab and click on the “Add view” from the ribbon button as shown in the below screen.

This will open a screen where you need to add the “Name” of the view and “Description” if required. And then click on “Create.”


Thursday, August 19, 2021

Get started with Power Automate

 "Get started with Power Automate"

What is Power Automate?

Power Automate is an online workflow service that automates actions across the most common apps and services. When you sign up, you can connect to more than 220 services, and can manage data either in the cloud or in on-premises sources like SharePoint and Microsoft SQL Server. 


What can you do with Power Automate?

You can use Power Automate to automate workflows between your favorite applications and services, sync files, get notifications, collect data, and much more.
  •  you can do the following tasks using automate flows:
  • Instantly respond to high-priority notifications or emails.
  • Capture, track, and follow up with new sales leads.
  • Copy all email attachments to your OneDrive for Business account.
  • Collect data about your business, and share that information with your team.
  • Automate approval workflows.

Menus in Power Automate:

  • Action items: where you can manage approvals and business process flows.
  • My flows: where your flows reside.
  • Create: where you start a new flow.
  • Templates: where you can take a look at some of the most popular templates. These should                              give you some great ideas for flows you want to try.
  • Connectors: where you can connect from one service to another.
  • Data: where you can access entities, connections, custom connectors, and gateways.
  •  Solutions: where you can manage your solutions.


Tuesday, August 10, 2021

How to build an automated solution

 How to build an automated solution:-

Important points in Microsoft Power Automate

 Every flow has two main parts: 

Trigger-> 

The trigger can be something like a new email arriving in your inbox or a new item is added to a SharePoint list.  

Action-> 

Actions are what you want to happen when a trigger is invoked.

Create a flow from a template:-

for creating flow first go to power automate. where you can see all available templates there.


If you click on a specific template, you will see details about the template including the data sources it will connect to.

when you click on create flow your flow will be created from a template.

Create the flow 

  • Launch Power Automate and sign in using your organizational account. 
  • In the left pane, select + Create.
  • Select Scheduled cloud flow under Start from blank. 
  • In the dialog box, specify the flow's name and how often the flow should run. 


  • Once you are satisfied with your inputs, select Create.


Introduction To Power Automate

 Power Automate:--

Power Automate is used to automate repetitive business processes. Beyond simple workflows, Power Automate can send reminders on past due to tasks, move business data between systems on a schedule, talk to more than 275 data sources or any publicly available API

Types of flows:-

Event driven flows - 

These are flows that you build with a trigger and then one or more actions. There is a multitude of triggers and actions available, thanks to the existing connectors. You will see these as My flows and Team flows in Power Automate. The only difference between a My flow and a Team flow is ownership. With a My flow you are the sole owner, while a Team flow has more than one owner.  

Business process flows - 

These flows are built to augment the experience when using Model-driven apps and Microsoft Dataverse. Use these to create a guided experience in your Model-driven apps.  

Desktop flows - 

These robotic process automation (RPA) flows allow you to record yourself performing actions on your desktop or within a web browser. You can then trigger a flow to perform that process for you. You can also pass data in or get data out of the process, letting you automate even "manual" business processes.

Capabilities of Power Automate: 

 Automating repetitive tasks like moving data from one system to another  

Guiding a user through a process so they can complete the different stages 

 Connecting to external data sources via one of the hundreds of connectors or directly via an API 

 Automating desktop-based processes with robotic process automation (RPA) capabilities

Introduction To Portal

 Portal:-

Power Apps portals is used to create external-facing websites that allow users outside their organizations to sign in with a wide variety of identities, create and view data in Dataverse, or even browse content anonymously.

#Core components of portals:-

  • Power Apps portals Studio


Power Apps portals Studio components: 

1.Command bar -Allows you to: 

      Create a webpage. 
      Delete a component.
      Sync Configuration.
      Browse website.

 2.Toolbelt - Allows you to: 

      View and manage webpages
       Add components 
       Edit templates 

3.Canvas - 

       Contains components that build a webpage.

4.Footer - 

         Displays autosave status and allows you to the open-source code editor. 

5.Properties pane - 

        Displays properties of the webpage and selected components and lets you edit them      as required.

  • Webpages

A webpage is a document that is identified by a unique URL in a website. Through parent and child relationships to other webpages, webpages form the hierarchy of a website, that is, its site map. Webpages can be added and edited by using the Portal Studio, the portal front-side editor, or directly in Microsoft Dataverse by using the Portal Management app.

  • Page templates 

A webpage row does not define how the page looks when it is rendered on the portal. Instead, it is linked to the Page template row that defines the layout and the behavior. Think of the webpage as the exact URL and the Page template as the blueprint for displaying the content.

  • Content snippets 

Content snippets are reusable fragments of editable content that can be placed within a web template. Using snippets allows for targeted editing of parts of a page without affecting the overall content.

  • Table lists and table forms 

The strength of Power Apps portals is the ability to interact with information and data that is stored in Microsoft Dataverse. 

# portals security

The Portal Management model-driven app provides access to the contact table and has forms to manage passwords, view portal-specific contact information, and provide registration and profile management forms for the portal.

  • Authentication

 Portal users can authenticate by using -

 Local authentication -

Basic authentication with usernames and passwords are stored in the Microsoft Dataverse contact row internally.  

External authentication -

Credentials and password management are handled by other identity providers.

  • Authorization

 After the user is authenticated and associated with a contact, Power Apps portals use numerous tables to define authorization, that is, what a user is allowed to do. Selecting Share from the portal app options will provide information on how to share the portal app with internal and external users.

Monday, August 9, 2021

Model Driven App In Power App

 Model-Driven App In Power App:-

Model-driven app design is an approach that focuses on adding dashboards, forms, views, and charts to your apps. With little or no code, you can build apps that are simple or very complex.

Model-driven apps have three design phases:  

  1. Model your business data 
  2. Define your business processes 
  3. Build the app
Create a model-driven app 
  •  On the Home page, select the Model-driven app from blank.
  •  Click Create


  • On the Create a New App page, enter a name and description for the app.  
  • Select Done. Your new app appears in the App Designer, and you can now add components to it.
Add components to your app:
  •  Select the Open the Site Map Designer pencil icon to open the site map designer.

  • In the site map designer, select New Subarea, and then, in the right pane on the Properties tab, select  properties:  Type: Entity Entity: Account
  • Select Save And Close. 
  • In the App Designer, select Forms, and then, in the right pane under Main Forms, select the Account form.
  • In the App Designer, select Views, then select the following properties:                                                   Active Accounts           All Accounts          My Active Accounts
  •  In the App Designer, select Charts, then select the Accounts by Industry chart. 
  •  On the App Designer toolbar, select Save.
Publish your app 
On the App Designer toolbar, select Publish. After you publish the app, it's ready for you to run or share with others.


Get Started With Dataverse

 Microsoft Dataverse:-

In Microsoft Dataverse securely store and manage data used by business applications.

Tables

Data within Dataverse is stored within a set of records called Tables.A table is a set of records used to store data, similar to how a table stores data within a database.

how to create new custom table in dataverse:

  1. In the left navigation pane, expand Data, select Tables, and then select + New table.

  2. Under New table, enter the following:

    • Display namePet
  3. In the Primary Column section

    • Display name: Enter Name of Column
  4. At the bottom, click Create.


Add a relationship

  1. On the Relationships tab, on the table designer toolbar, select Add relationship, and then select Many-to-one.

  2. In the right pane, in the Related list, select Account.

  3. Select Done.

  4. Select Save table.


Customize the main form

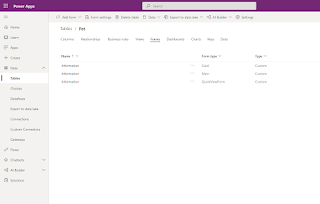
  • In the left navigation pane, expand Data, select Tables, and then select Pet.
  • On the Forms tab, select Information next to the Main form type to open the form editor.

  • In the form editor, drag the SpeciesBreedAppointment date, and Account columns from the Column Explorer pane to the General section of the form canvas, so that the form looks like this.


  • Select Save.
  • Select Publish.
  • Click the back arrow in your browser to close the form designer.

Customize a view

  1. On the Views tab, right-click Active Pets view and select Open Link in New Tab. If you don't see the Active Pets view, select Remove filter.

  2. In the view designer, select + View Column, select the following columns, and then select OK

  3. Select the Created On column, select Remove.

  4. To arrange the columns, select the column to move, and then select Move Left or Move Right until your view looks like this. You could also simply drag and drop the columns to arrange the order as well

Introduction to Power BI

    Introduction to Power BI What is BI? Business intelligence is a technology-driven method that helps you to analyze data and to provide a...